Updating cached password over VPNs
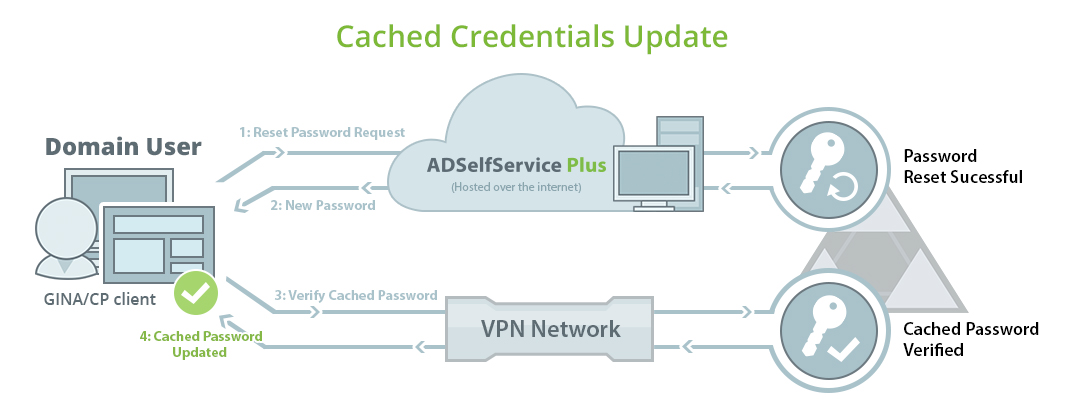
ADSelfService Plus can update local cached credentials stored in users’ machines so remote users can access their machines even if they forget their passwords.
Fig 1: Image showing how a cached credential is updated by the login agent.
-
ADSelfService Plus places a Reset Password/Account Unlock link on the login screen of Windows, macOS, and Linux machines to enable self-service password reset. Clicking this link will open the password self-service portal.
- Users are required to prove their identity through any one of the enforced authentication methods, like SMS-based one-time passwords (OTPs), email-based OTPs, Google Authenticator, Duo Security, and RSA SecurID.
Important:
-
Users must be enrolled in ADSelfService Plus to utilize the self-service password reset and self-service account unlock capabilities.
-
Enrollment is a one-time process where users enter their mobile number and email address, set answers to security questions, and provide other details in ADSelfService Plus in order to register for self-service password management. Learn how to enroll users.
-
Once a user’s identity is successfully verified, they will be allowed to reset their forgotten AD domain passwords.
-
ADSelfService Plus resets the AD password and alerts the logon agent about the successful completion.
-
The logon agent establishes a secure connection with AD through a VPN client and initiates a request for updating the local cached credentials.
-
After the request is successfully approved by AD, the cached credentials are locally updated on the user's machine.
Supported VPN clients:
-
Fortinet
-
Cisco IPSec
-
Cisco AnyConnect
-
Windows Native VPN
-
SonicWall NetExtender
-
Checkpoint EndPoint Connect
-
SonicWall Global VPN
-
Custom VPN
-
OpenVPN
Configuration Steps:
-
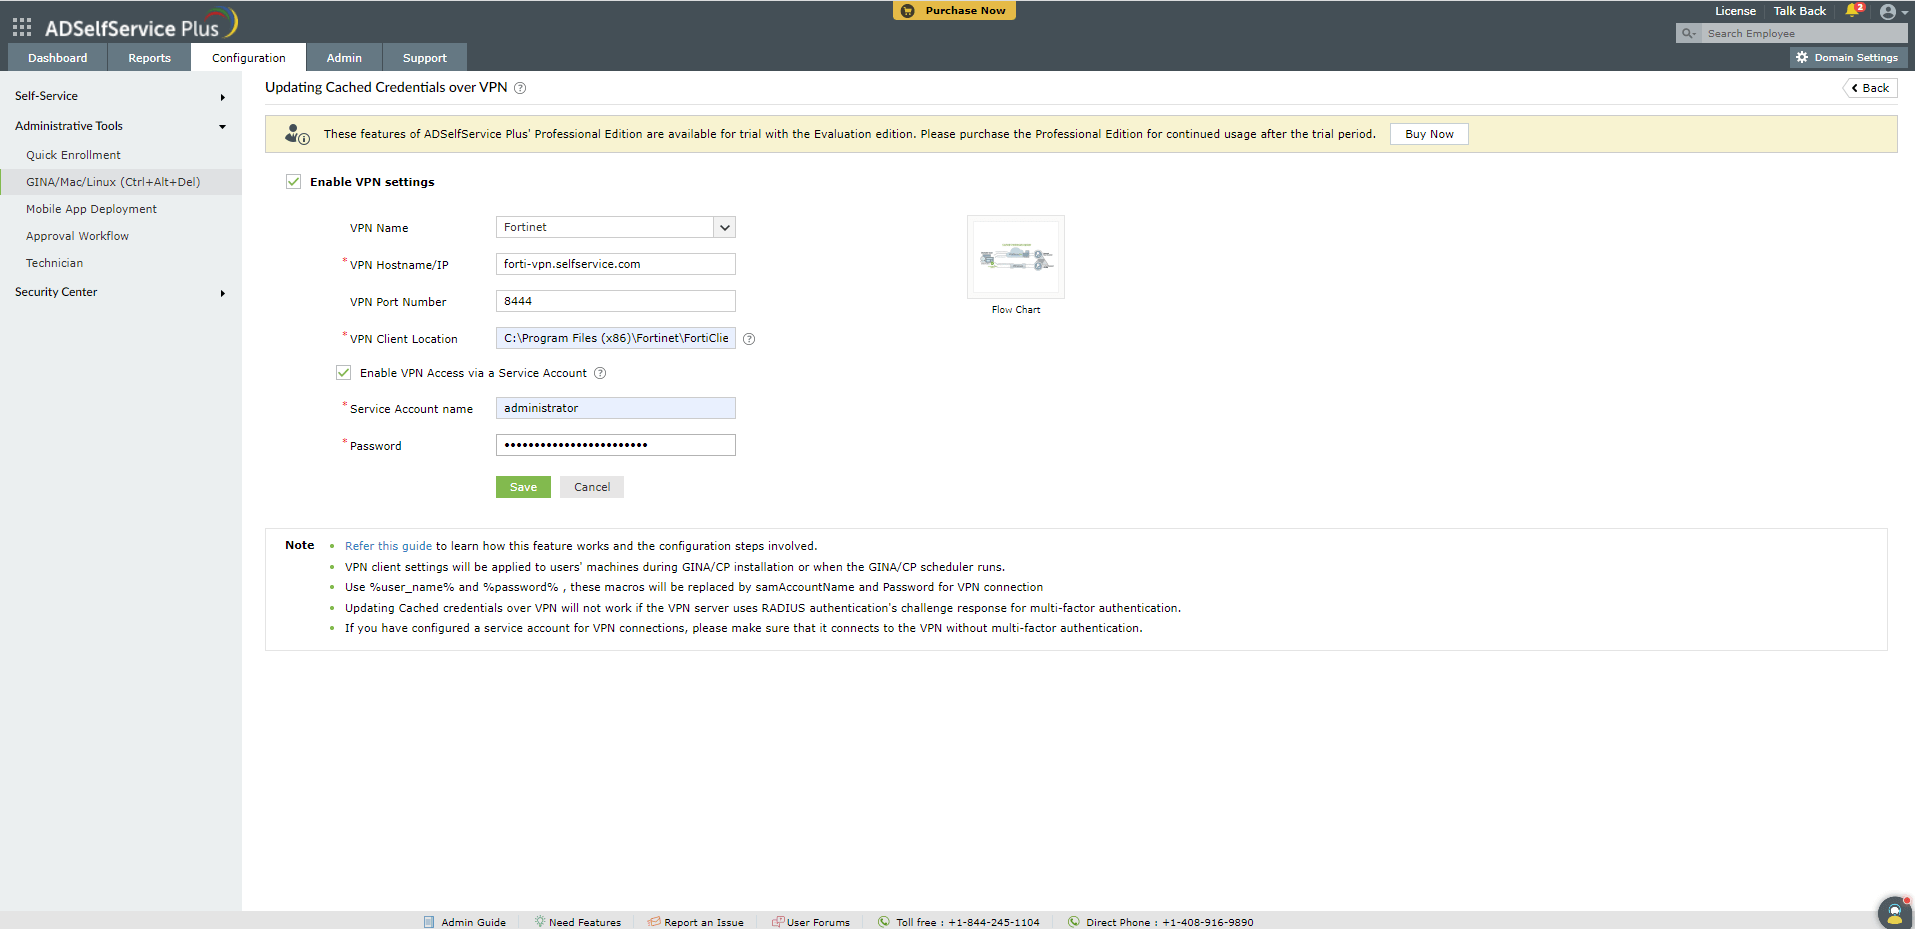
Navigate to Configuration → Administrative Tools → GINA/Mac/Linux(Ctrl+Alt+Del).
-
Click Updating Cached Credentials over VPN.
-
Select Enable VPN settings.
-
Select the VPN Provider from the drop-down list.
-
Enter the VPN HostName/IP address address and VPN port no in their respective fields.
-
Enter the location where the VPN client (Example: C:\Program Files
(x86)\Fortinet\FortiClient) is installed on the users' machines.
Fig 2: Image depicting the list of supported VPN clients.
-
For Custom VPN, macros (%user_name%, %password%, etc.) can be used in
the VPN Connect/Disconnect Command. (Note: The syntax for
the VPN Connect/Disconnect Command varies depending on the VPN provider
used.)
Example:
connect -s adsspvpn -h %servername%:%portno% -u %user_name%:%password%
-
Click Save.
Note:
The VPN configurations will be reflected on the users’ machine either during the GINA/Mac/Linux client installation, or when the GINA/Mac/Linux scheduler runs.

