Password Synchronization with ServiceNow
Steps to configure ServiceNow accounts with ADSelfService Plus
Important : Install the Password Sync Agent to synchronize native password changes and resets.
-
Log into ADSelfService Plus admin console with admin credentials.
-
Navigate to Configuration → Self-Service → Password Sync/ Single Sign On.
-
Select the ServiceNow application.
Note:
You can also find ServiceNow application that you need from the search bar located in the left pane or the alphabet wise navigation option in the right pane.
-
Enter the Application Name and Description.
-
In the Instance Name, enter the instance name from the instance URL of the ServiceNow account.(Example: https://<Instance Name>.service-now.com/)
-
In the Assign Policies field, select the policies for which password sync need to be enabled.
Note:ADSelfService Plus allows you to create OU and group-based policies for your AD domains. To create a policy, go to Configuration → Self-Service → Policy Configuration → Add New Policy.
-
Select Enable Password Sync.
-
Type the User Name and Password of the ServiceNow account in the respective fields. If the user account does not have read and write privileges to either sys_user.user_password or sys_user.locked_out, they must be provided manually.
-
Click Add Application.
A. Privileges required to change password
-
Login to the ServiceNow web-console with admin credentials.
-
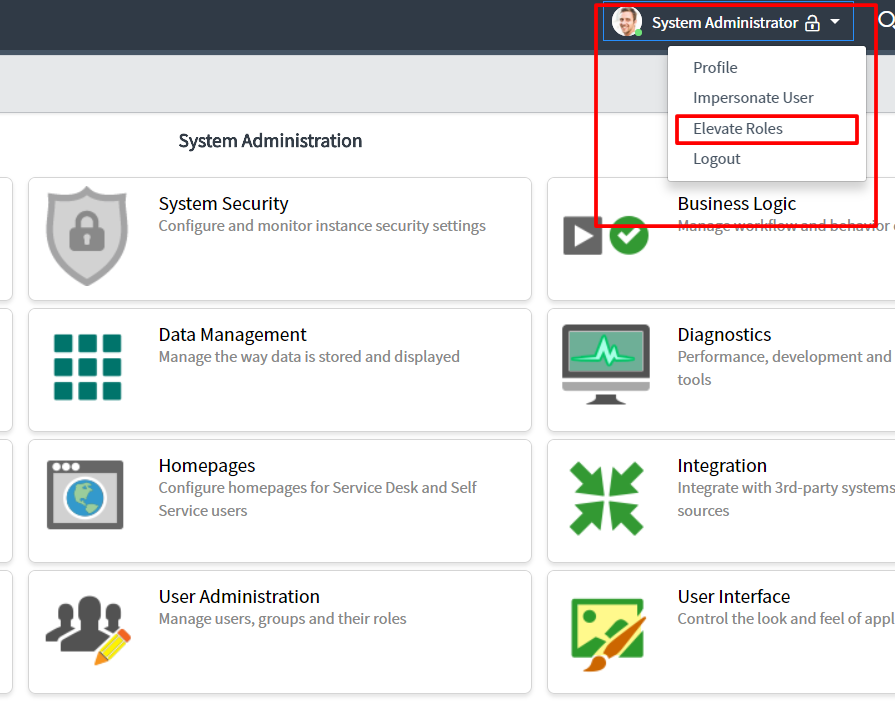
From the System Administrator drop-down box, select Elevate Roles.
-
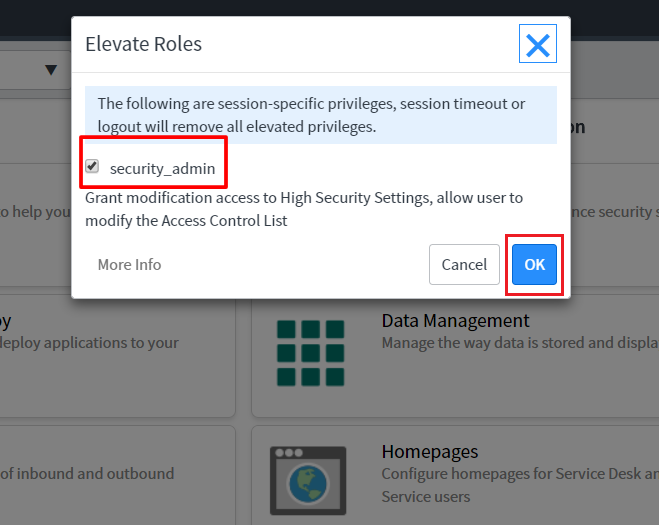
Select the security_admin option and click OK.
-
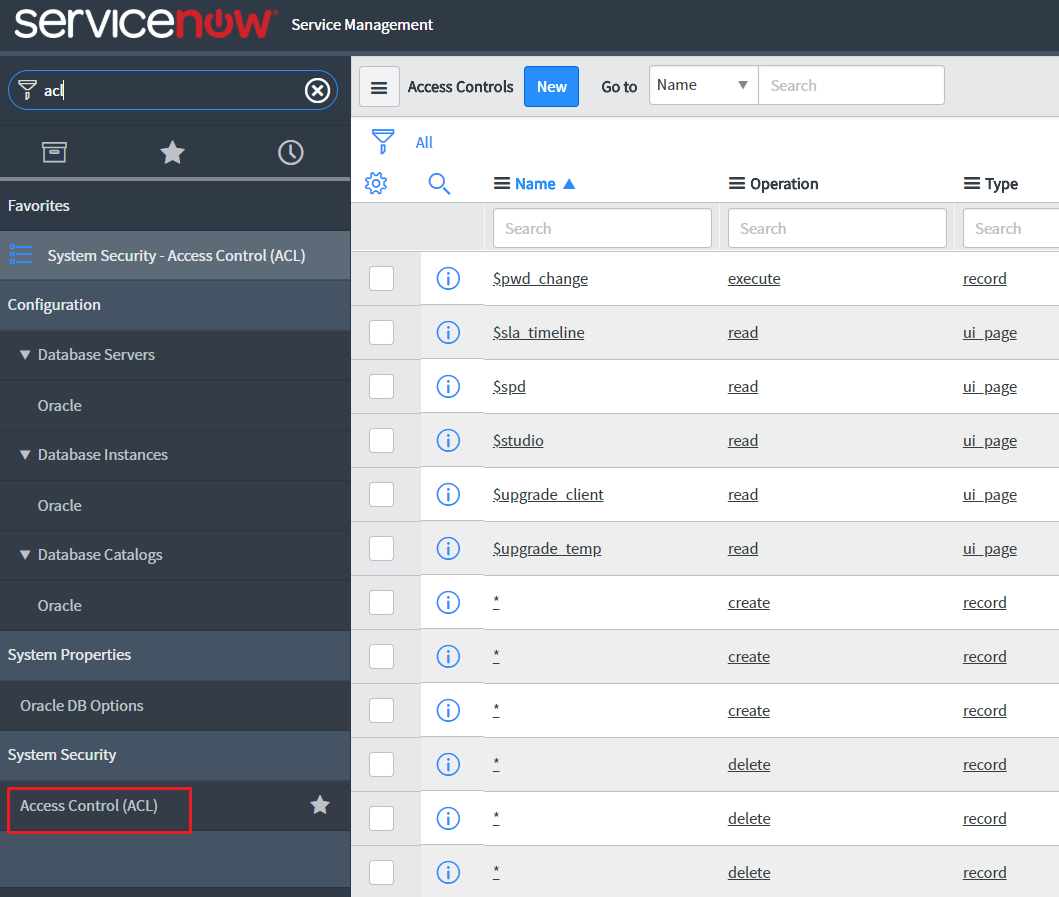
Now select the Access Control tab from the System Security module.
-
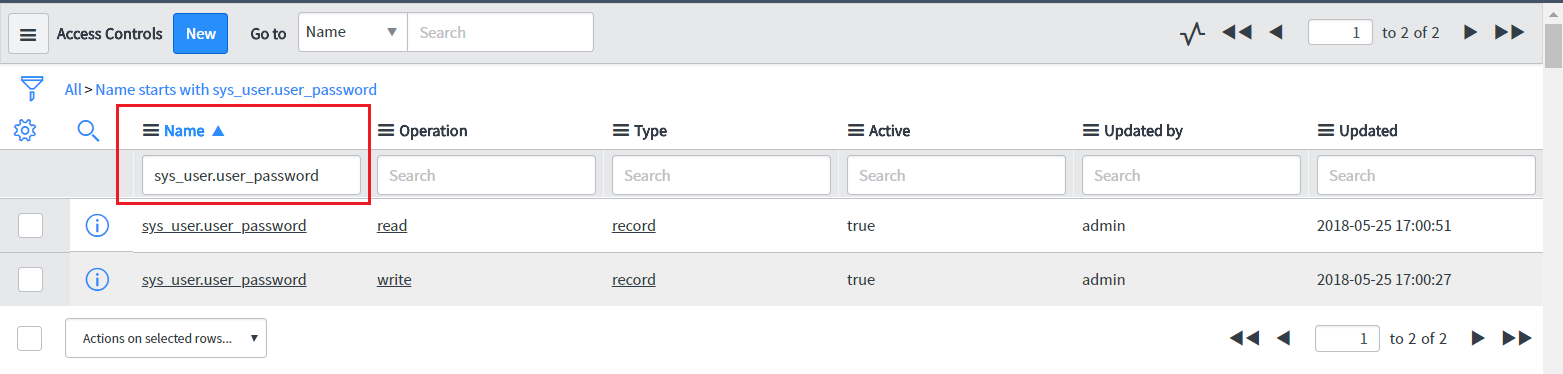
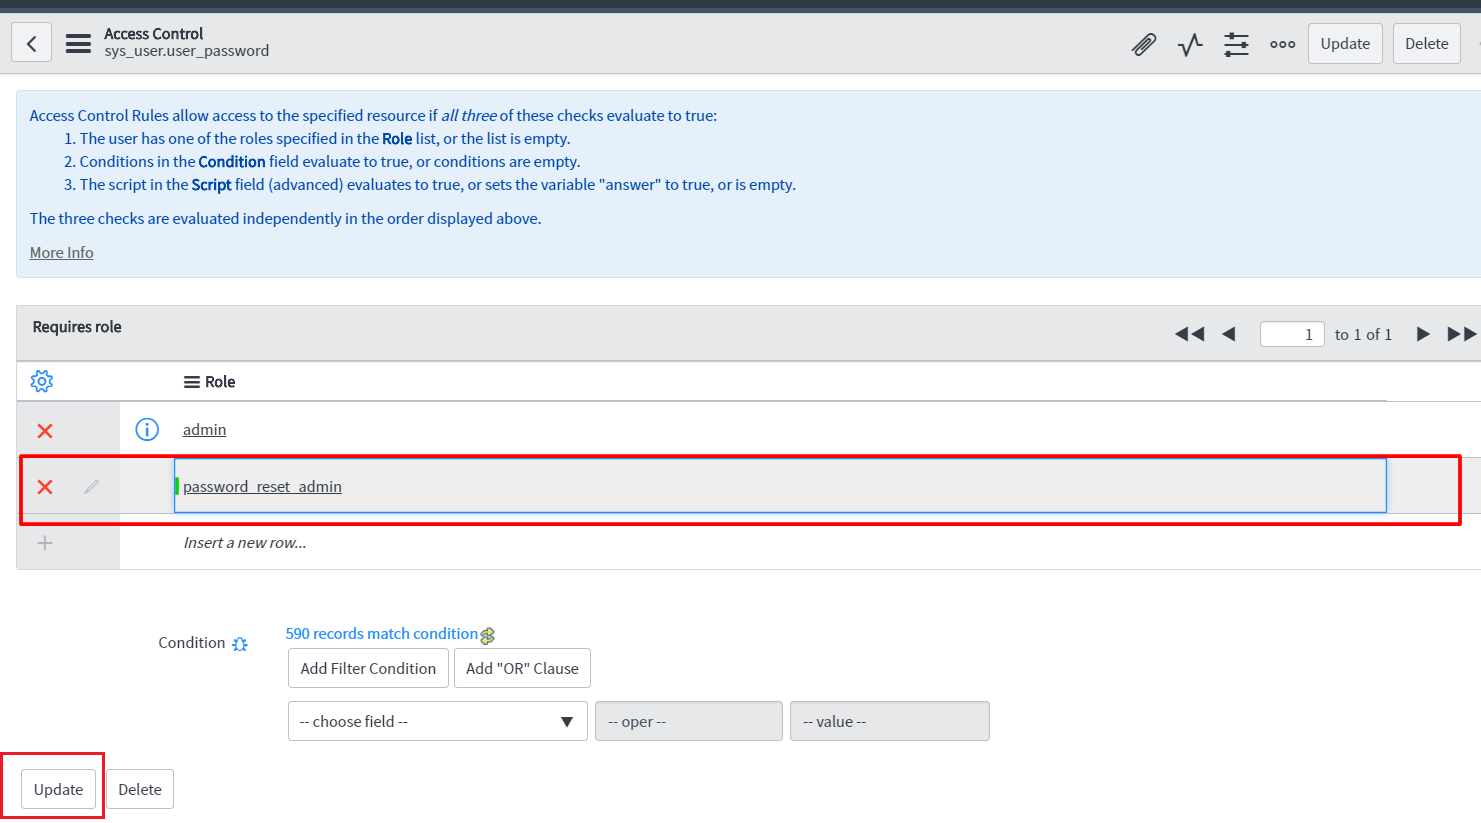
In the Search field of the Name module, type sys_user.user_password. From the list displayed, select the sys_user.user_password field with read operation.
-
Click Insert a new row to add a new role. Click Update.
-
Back in the Search list, select the sys_user.user_password field with write operation. Add a new role by selecting Insert a new row and Update the changes.
B. Privileges required to unlock account
-
In the Search field of the Name module, type sys_user.locked_out. From the list displayed, select the sys_user.locked_out field with read operation. Add a new role by selecting Insert a new row and Update the changes.
-
Back in the Search list, select the sys_user.locked_out field with write operation. Add a new role by selecting Insert a new row and Update the changes.
Users with the privileged roles can now configure password synchronization between ServiceNow and Active Directory in ADSelfService Plus.


 ADManager Plus
 ADAudit Plus
 Exchange Reporter Plus
 M365 Manager Plus