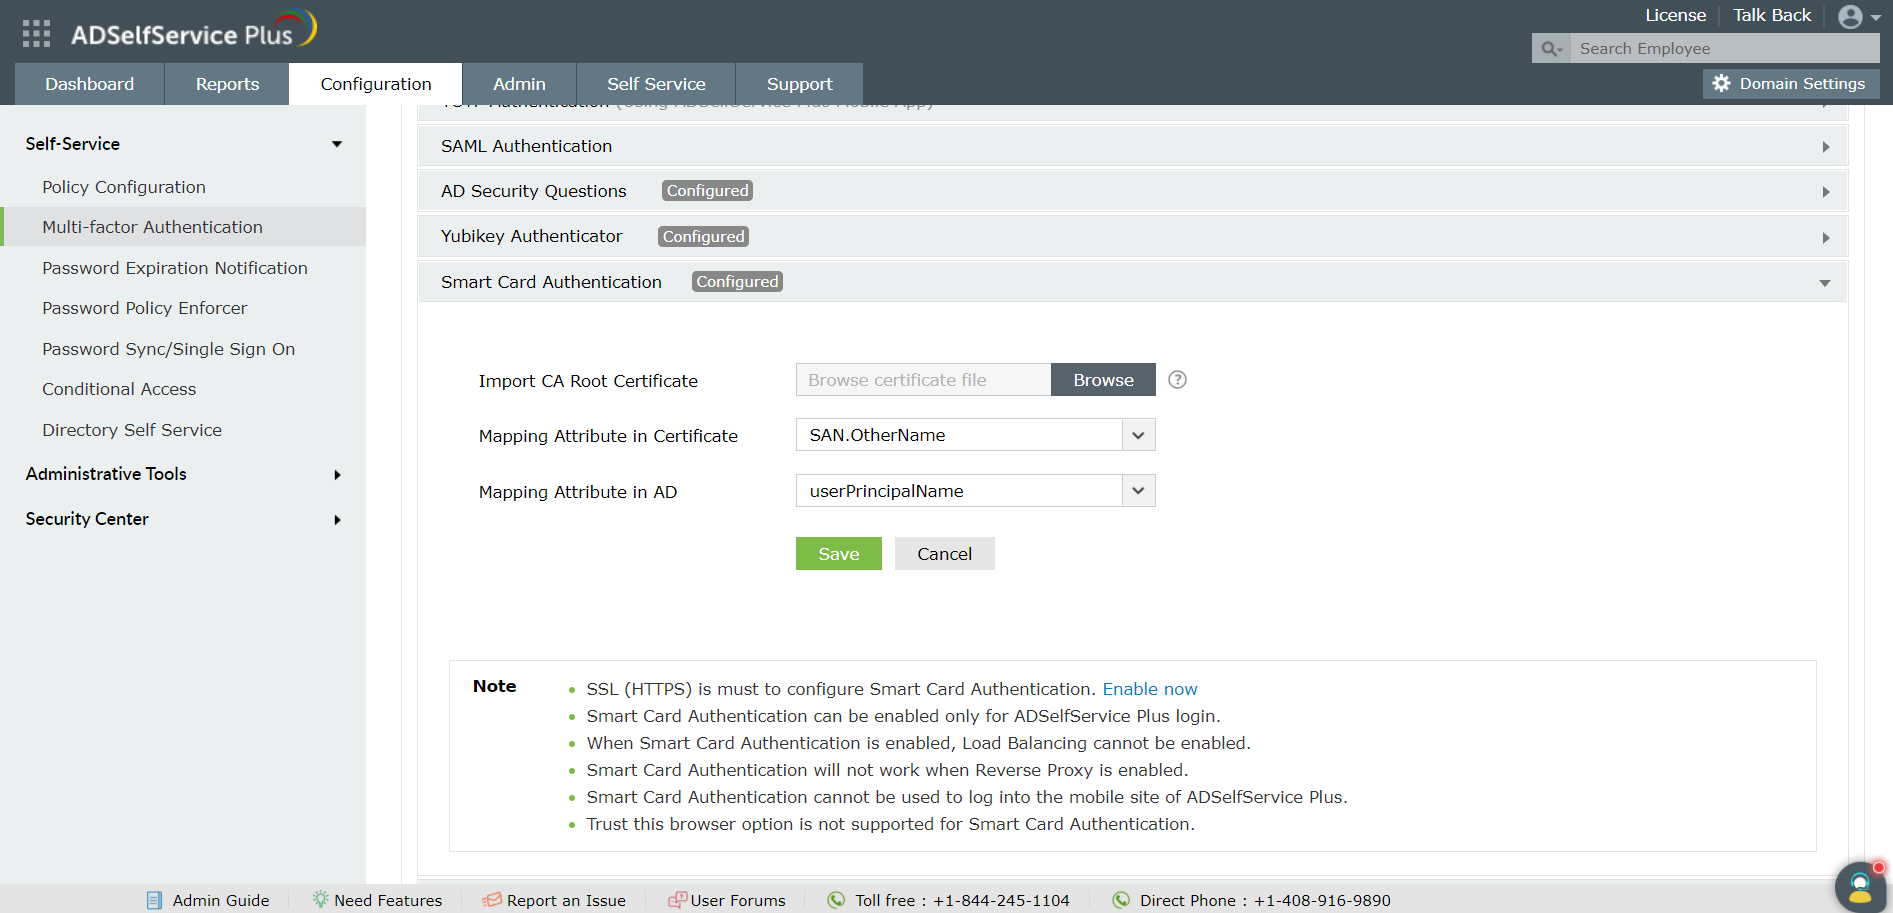
Smart Card Authentication
ManageEngine ADSelfService Plus supports smart card authentication, as one of the multi-authentication factors for its web portal login. The user is authenticated after ADSelfService Plus compares the certificate file on the user's machine with the one in Active Directory (AD).
Prerequisite
- Navigate to Admin → Product Settings → Connection. Select the HTTPS Mode radio button, and enter the port number. Click Save.
- Obtain the CA Root Certificate from a certificate authority (CA). Keep this certificate safe as you will need this file while configuring the smart card authenticator. If you are using a Windows server as your CA, download the certificate file from: http://<CertificateAuthorityServerName>/certsrv/.
Note: Replace <CertificateAuthorityServerName> in the URL with the name of your certificate server.
Important:
- Smart Card Authentication can be used only for ADSelfService Plus web portal login.
- When Smart Card Authentication is enabled, load balancing cannot be enabled.
- Smart Card Authentication will not work when reverse proxy is enabled.
- The Trust this browser option is not supported in Smart Card Authentication.
Follow these steps:
- Log into the ADSelfService Plus web portal with Admin credentials.
- Navigate to Configuration > Multi-factor Authentication > Smart Card Authentication.

- In the Import CA Root Certificate field, click Browse to import the required root certification file (X.509 certificate). (To obtain a CA Root Certificate, refer to step 2 in the Prerequisites section above.)
- Select a unique attribute in the certificate for mapping from the Mapping Attribute in Certificate drop-down list.
- Ensure that a unique attribute from the certificate is mapped to a unique attribute in AD. Both attributes must have the same value.
- ADSelfService Plus allows you to select any attribute of the smart card certificate that uniquely identifies a user. The available attributes are SAN.OtherName, SAN.RFC822Name, SAN.DirName, SAN.DNSName, SAN.URI, emailaddress, DN, and CommonName. You can also add other attributes that are used to uniquely identify the user in your environment by entering the attribute name in the text box provided and clicking the + icon.
- Specify the LDAP attribute that should be matched with the specified certificate attribute from the Mapping Attribute in AD drop-down list. You need to specify the particular LDAP attribute that uniquely identifies the user in AD (for example sAMAccountName).
- During authentication, ADSelfService Plus compares this value and the certificate attribute that you specified in the certificate's mapping attribute to verify the user's identity.
- Click Save.
- Restart ADSelfService Plus for the changes to take effect.
