Connection Settings :
You can configure the SSL settings, proxy settings, session time settings, and other privacy settings here. Connection Settings involves following features :
Connection Settings :
-
Click Admin → Product Settings → Connection.
-
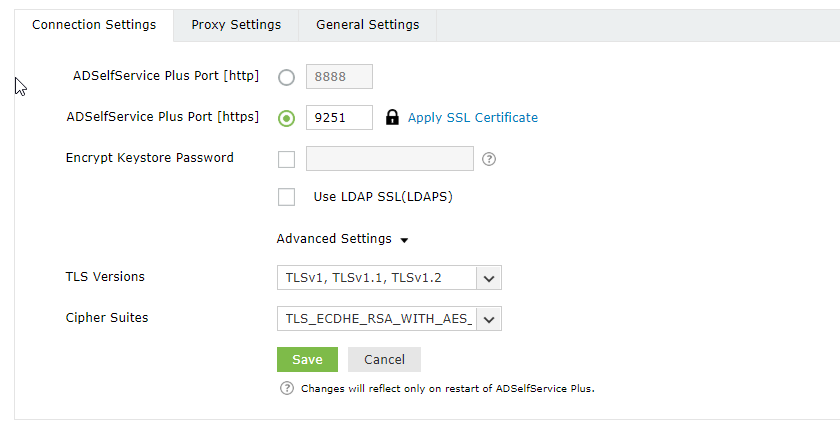
Click Connection Settings tab. You can choose a HTTP or a HTTPS port.

-
Select the ADSelfService Plus Port [HTTP] and enter the port number of your choice.
-
If you want to configure a HTTPS port, select the ADSelfService Plus Port [HTTPS] option and enter the port number.
-
If you want to apply SSL certificate, Click Apply SSL Certificate ( optional ) and follow the steps.
-
Select the Enable LDAP SSL to secure communication between Active Directory and ADSelfService Plus.
-
Select the Encrypt keystore password and enter the keystore password. The password you enter will be encrypted for better security
Note: The value of keystorePass property in the server.xml file will be replaced with the macro adssp.keystorePass.
-
Select the TLS Versions and the Cipher Suites from the drop-down.
-
Click Save.
Important : If you’ve hosted ADSelfService Plus over the internet or behind a proxy server, you can
configure an access URL to provide end users with access to ADSelfService Plus.
Proxy Settings :
-
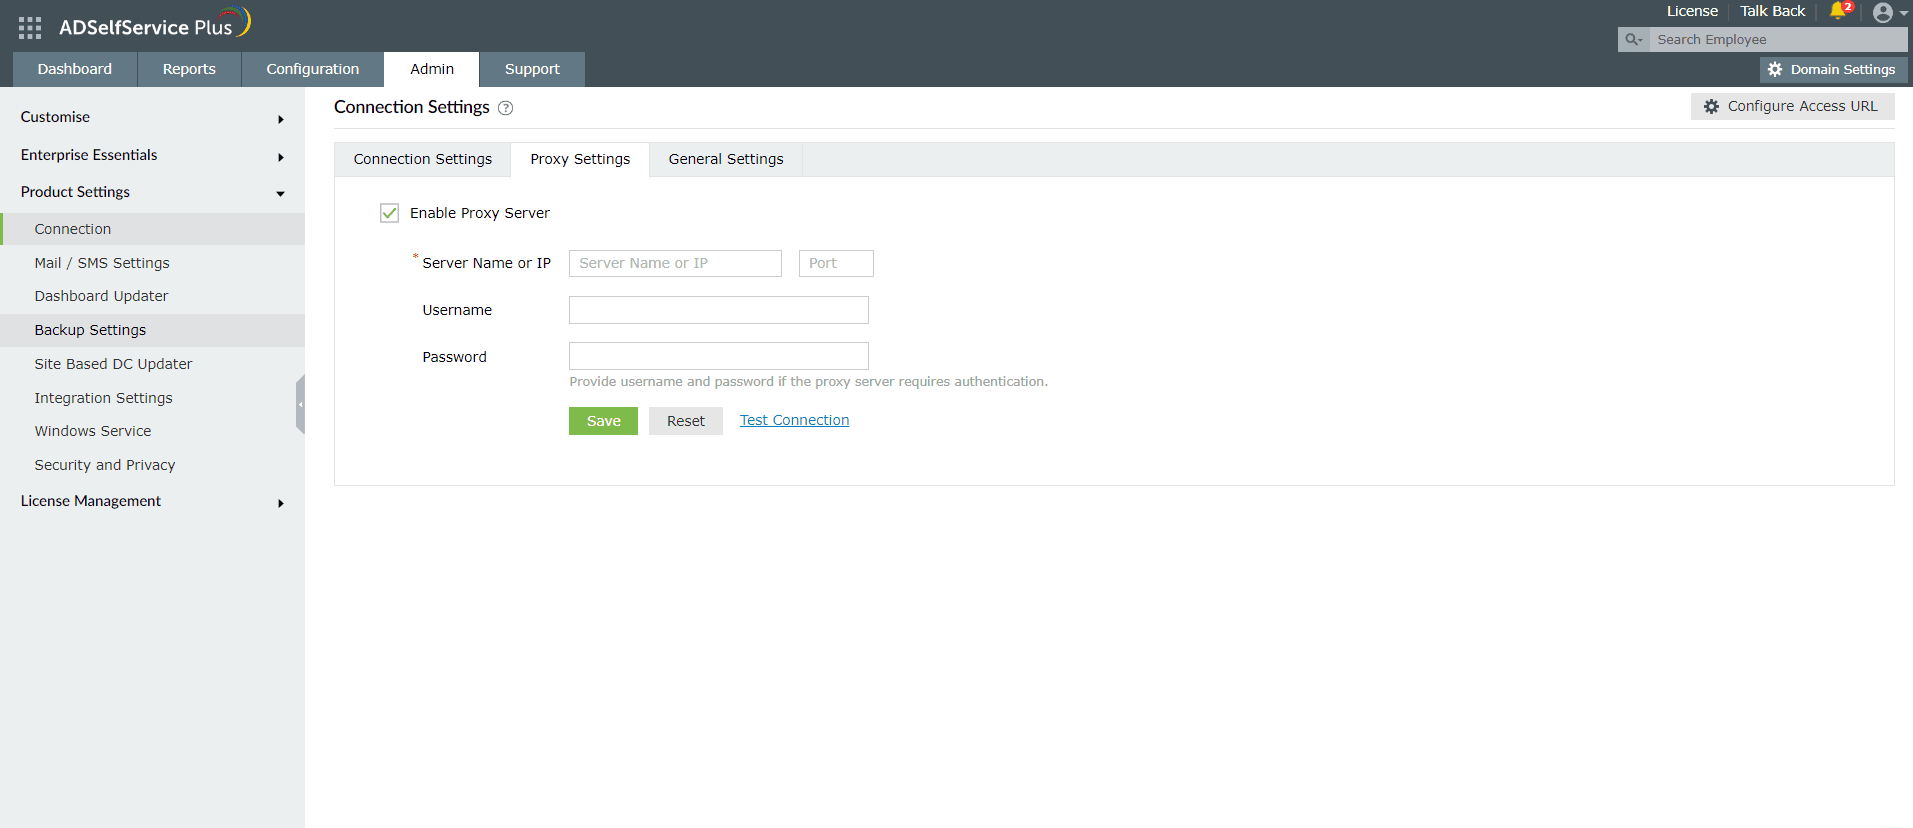
Select the Enable Proxy Server .
-
Enter the Server Name or IP of the Porxy.
-
Provide the required authentication details by entering the Username and Password.
-
Click Save.
Note : Use Test Connection for verifying proxy server connection is valid.

General Settings:
Session Settings:
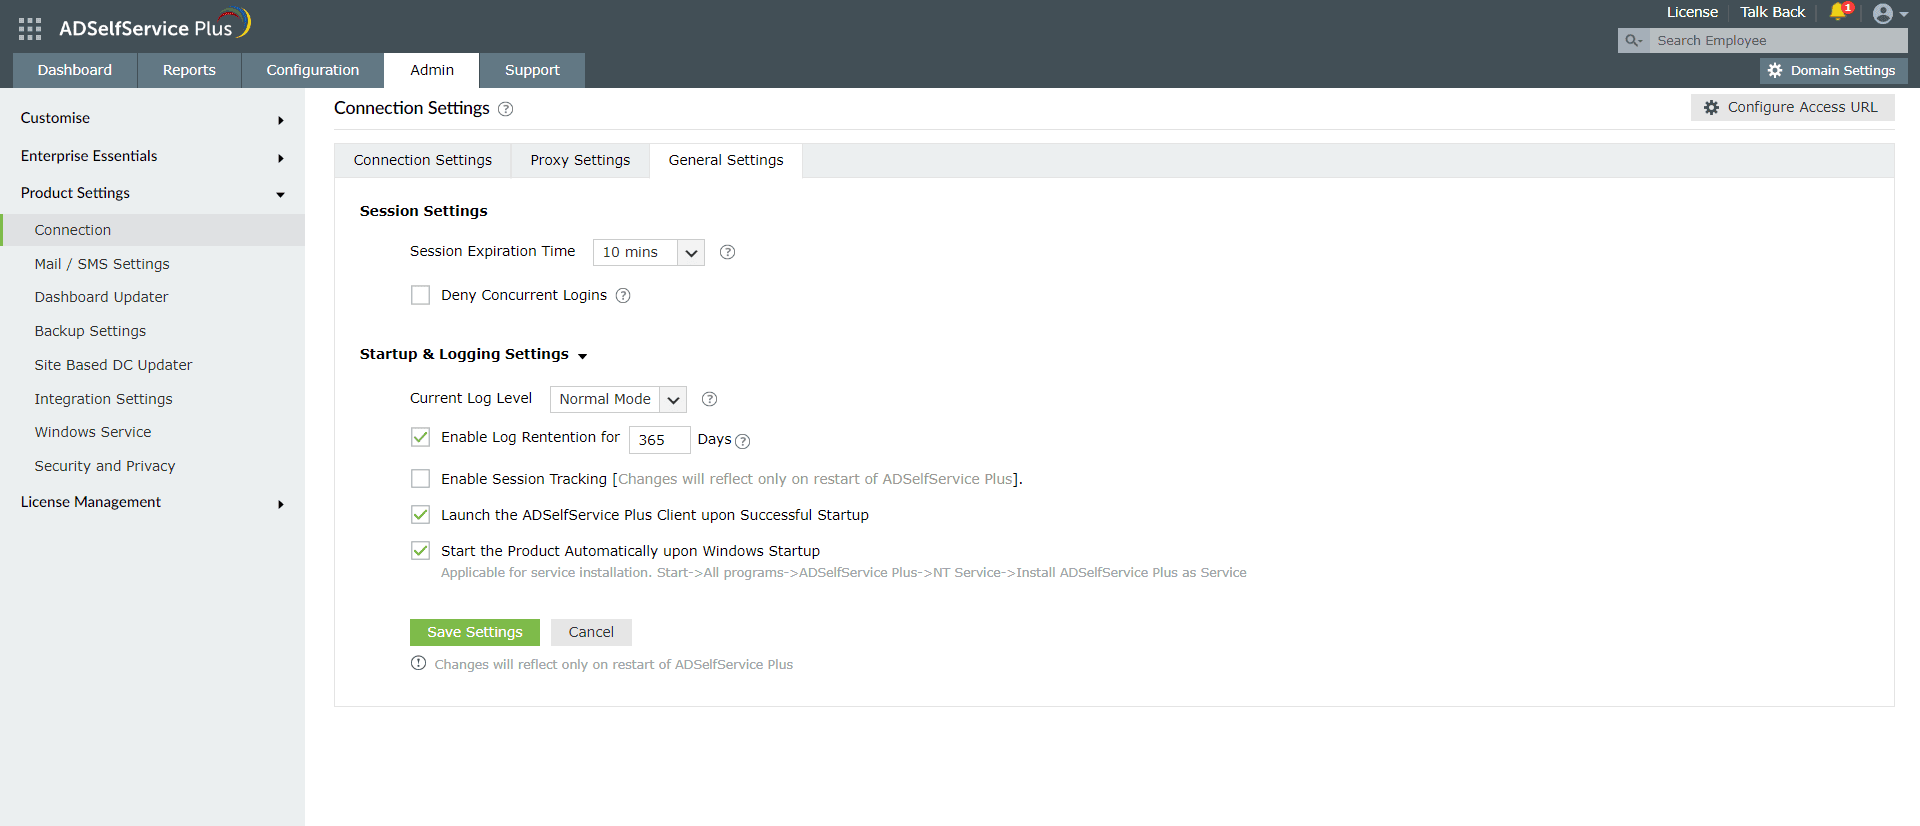
Session Expiry Time is the maximum duration a user's ADSelfService Plus session can remain idle before being terminated. Configure session expiration time for users (from 10 minutes to Never expires) by selecting the Session Expiration Time of your choice from the drop-down.
Note: Changes take effect only after the ADSelfService Plus server is restarted.

Follow these steps :
-
Navigate Admin tab → Product Settings→ Connections→ General Settings.
-
Select a session expiration time limit from the drop-down.
Deny multiple logins for a user:
When Deny Concurrent Logins is enabled, users can’t log in to ADSelfService Plus from multiple client endpoints. That is, users will not be able to log in to ADSelfService Plus if there is another active session in a browser or the mobile app.
Users can log in again only after they log out from all existing sessions, or until their session time expires.
Follow these steps :
-
Navigate to Admin tab → Product Settings → Connections.
-
Check the Deny Concurrent Login checkbox.
Attempts to log into ADSelfService Plus web console when there is another active session will result in an error message.
Clearing the session status of users
When Deny Concurrent Login is enabled, if a user closes a browser which has an active ADSelfService Plus session, the user will not be able login to his/her portal until the idle session time expires. To avoid such inconveniencing users, you can configure ADSelfService Plus to reset the session status of the user. Follow the steps below to change user's login status.
Steps to be followed to change the login status:
-
Navigate to Admin tab → Product Settings → Connections→ General Settings.

-
Under Deny Concurrent Login , Select the click here link to reset the session status of all users.
-
In the Confim action popup, Click Yes.
Privacy settings
-
Usage statistics gathering: Select this option to send anonymous product usage statistics to the ADSelfService Plus team.
-
Change Password For Database Backup Files: Create a custom password with a minimum of eight characters to protect the ADSelfService Plus database backup files.
Note: By default, the password for the database backup (ZIP) files will be the reverse of the filename. Setting a new password here will overwrite the default password of the backup (ZIP) file.
Startup & Logging Settings
-
To collect minimum debug information, select the Normal mode. To get in-depth debug information, select the Debug mode.
-
Track user sessions by selecting Enable Session.
-
Select Launch the ADSelfService Plus client upon successful startup.
-
Select Start the product automatically on Windows Startup.
-
Click Save Settings.
Note: The changes made will be reflected after ADSelfService Plus is restarted.


